


You've bought a shirt online that looked perfect in the photos, and it arrived either swimming on your frame or pulling tight across your shoulders. Learning how to measure chest for t shirt sizing is the fix, and it takes about two minutes with a soft tape measure and a mirror. Most sizing mistakes come from skipping this step entirely and guessing based on a shirt you already own, one that might not even fit you correctly in the first place.
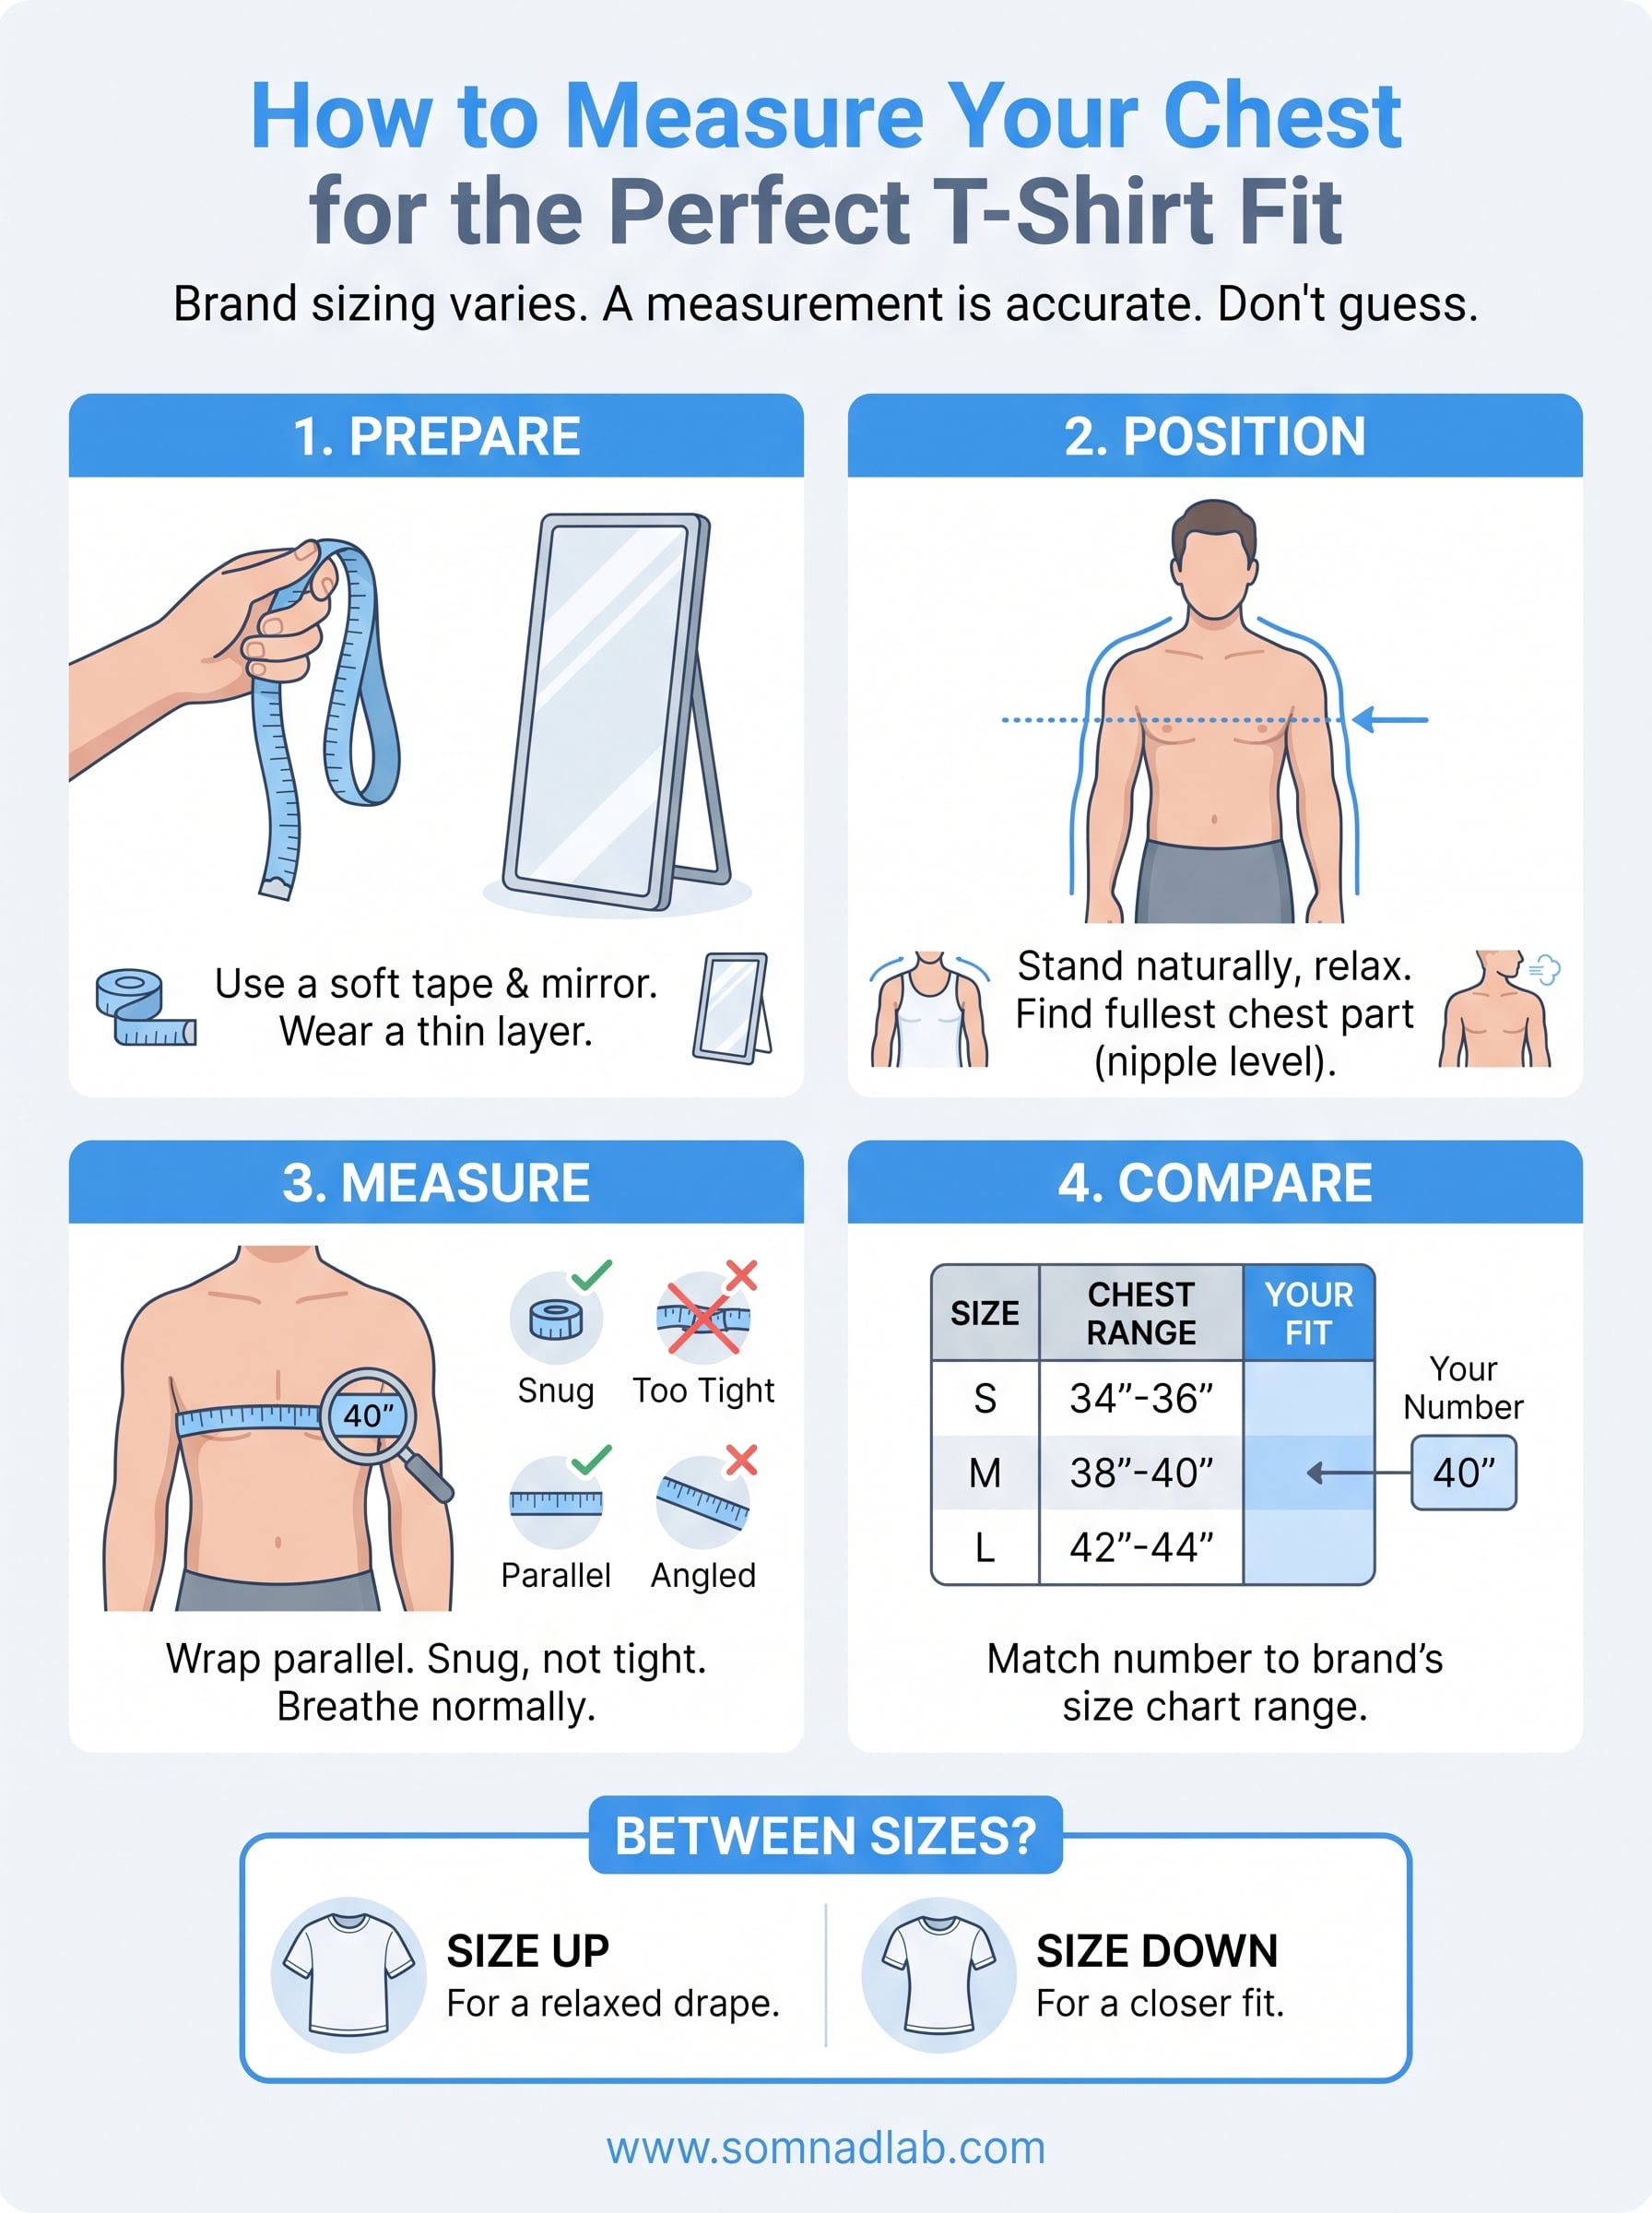
Here's the direct answer: wrap a flexible tape measure around the fullest part of your chest, usually right at nipple level, keep it parallel to the floor, and take the reading while breathing normally. That number, not your dress size or your gut feeling, is what you match against a brand's actual size chart.
Below, we'll walk through the exact process step by step, including how to get an accurate reading solo, what to do if your chest and shoulder measurements pull you between two sizes, and how a relaxed-fit tee like ours should sit once you've got the right number. If you want a shirt that drapes cleanly instead of clinging or drowning you, this measurement is where it starts.
Why an accurate chest measurement matters for fit
Sizing on a tag is a suggestion, not a guarantee. A medium from one brand can measure a full two inches wider or narrower than a medium from another, because there's no universal standard governing what those letters mean. Manufacturers set their own size charts based on their target customer, their fabric, and honestly, sometimes just tradition. That's why the same person can wear a small in one shirt and a large in another without gaining or losing a pound.
Guessing from a shirt already in your closet compounds the problem, especially if that shirt never fit right to begin with. Maybe it shrank in the wash, maybe you bought it a size up out of habit, or maybe it's stretched out from years of wear. Basing a new purchase on a flawed reference just repeats the mistake in a different shirt. A tape measure doesn't have any of that history. It gives you a fixed number tied to your actual body, which is the only measurement that stays consistent no matter which brand you're shopping.
Your body doesn't change size between brands, so measure it once and use that number everywhere.
Fit problems show up in predictable ways once the chest measurement is off. Too tight, and the fabric pulls across your chest and shoulders, the seams strain, and the shirt reads as a size too small even if the tag says otherwise. Too loose, and you get excess fabric bunching at the sides, sleeves that hang past where they should, and a silhouette that looks sloppy instead of relaxed. Neither extreme does justice to a well-made tee, no matter how good the cotton is. This is exactly why finding your chest size for a t shirt is worth the two minutes it takes, rather than rolling the dice on a size label and hoping for the best.
Once you know your real number, sizing decisions get simple. You compare that figure directly against a brand's chart instead of translating vague labels like small, medium, or large across different manufacturers. It's the difference between shopping by guesswork and shopping with actual data about your own body.
Step 1. Gather your tape measure and a mirror
Grab a soft, flexible tape measure, the kind used for sewing, not the retractable metal one from your toolbox. A metal tape measure won't curve around your ribcage, and you'll end up with a number that's technically straight but doesn't match the shape of your body. If you don't already own one, they cost a few dollars at any craft store or fabric shop, and it's worth having on hand for future purchases too.
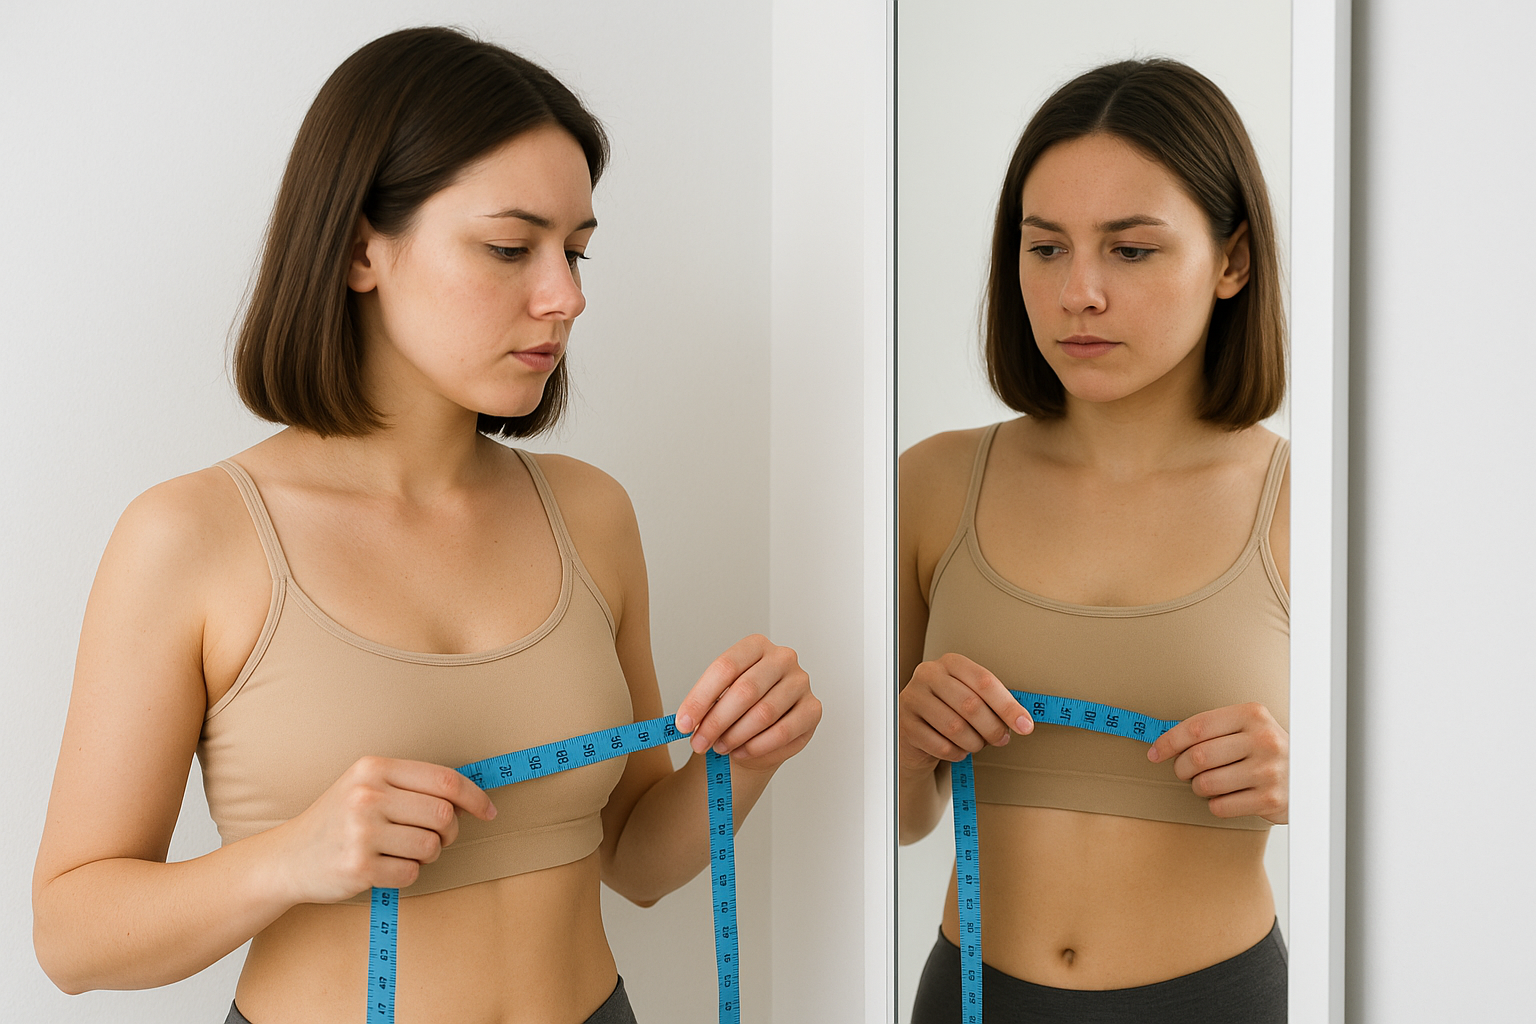
Position yourself in front of a full-length mirror so you can watch the tape as you wrap it around your chest. This matters more than people expect. Without a mirror, it's easy to let the tape dip lower in the back than the front, or angle it slightly upward without noticing, both of which throw off your reading by half an inch or more. A mirror lets you catch and correct these mistakes in real time instead of guessing after the fact.
A mirror turns a blind guess into a measurement you can actually verify.
Strip down to a thin, well-fitted layer, ideally just your underwear or a snug undershirt. Measuring over a hoodie or a loose t-shirt adds bulk that inflates your number and defeats the purpose of measuring in the first place. If you're doing this alone, a bit of practice helps: loop the tape once around loosely, get it level in the mirror, then snug it down before reading the number. Having someone else hold the tape for you removes the guesswork entirely, but it's not required if you take your time and check your reflection twice.
Step 2. Stand naturally and find your starting point
Posture affects your number more than most people realize. Stand the way you normally do, with your shoulders relaxed and your arms hanging loosely at your sides, not pulled back like you're posing for a photo. Puffing your chest out or squaring your shoulders artificially can add an inch or more to your reading, and that inflated number will steer you toward a shirt that ends up loose everywhere except where you actually need room.
Relaxing matters just as much as positioning. Take a normal breath in and let it out before you start wrapping the tape, since holding your breath or sucking in your stomach shifts your ribcage just enough to throw off the result. You want your natural stance, the one you'd hold standing in line at a coffee shop, not a flexed or braced version of yourself.
Measure the body you actually live in, not the one you can hold for three seconds in a mirror.
Finding your starting point comes next. Locate the fullest part of your chest, which for most people sits right around nipple level, then confirm the spot by glancing in the mirror from the front. Everyone's proportions differ slightly, so if your chest is fuller a bit higher or lower, follow what you see rather than assuming it's exactly at nipple height. Getting this starting point right sets up the actual wrap in the next step, and it's worth the extra few seconds to confirm before you commit to a reading.
Step 3. Wrap the tape around the fullest part of your chest
Bring the tape around your back and cross it in front at the spot you located in Step 2. Keep it parallel to the floor the entire way around, not angled up in back or dipping down in front. Check your reflection from the side if you can, since that's the angle where a crooked tape is easiest to miss and hardest to catch from straight on.
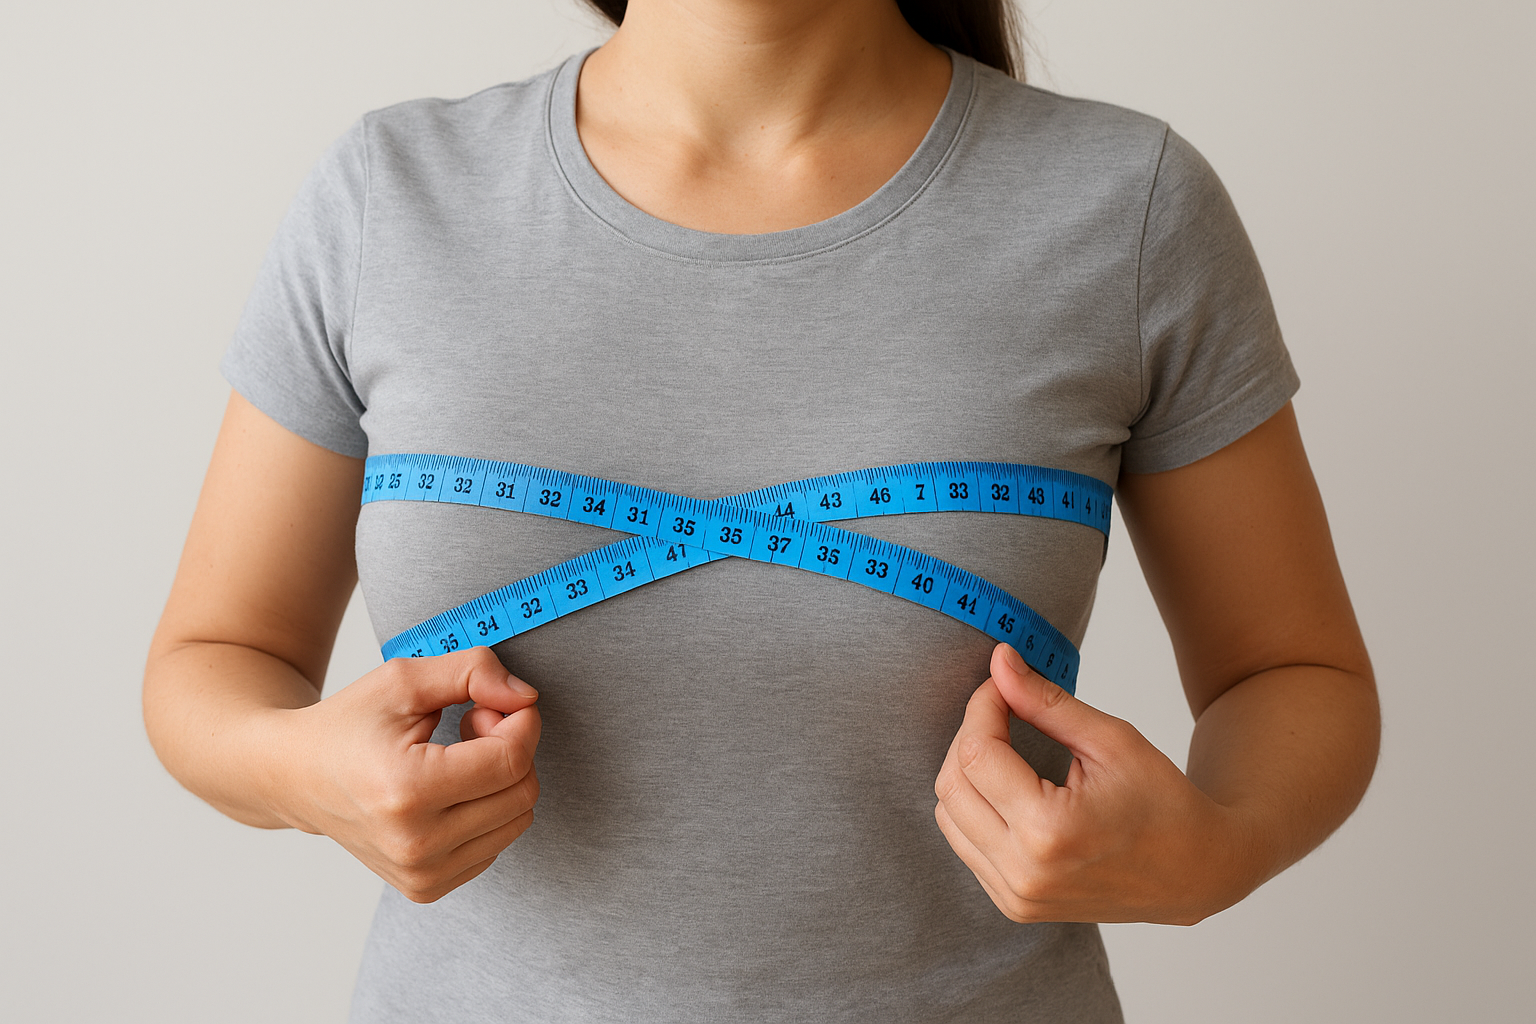
Snug the tape against your skin without pulling it tight. You're aiming for contact, not compression. If the tape leaves a mark or you can feel it pressing into your ribs, loosen it slightly. Too tight and you'll shrink your number by half an inch or more, which pushes you toward a shirt that fits your measurement but not your actual body.
A tape that's too tight lies to you just as much as one that's too loose.
Read the number where the tape overlaps itself, and read it while breathing normally rather than mid-inhale or after exhaling all the way. If you're unsure, take the measurement twice and use the average of the two:
- First pass: wrap, snug, read, write it down.
- Second pass: reset the tape from scratch, repeat the process.
- Average the two numbers if they differ by more than a quarter inch.
This takes an extra thirty seconds and catches the small inconsistencies that come from measuring solo. That final number is what you'll compare against a size chart next.
Step 4. Match your number to a size chart
Once you have your final chest measurement, pull up the brand's actual size chart instead of relying on the generic small, medium, large label on the product page. Every brand publishes these numbers for a reason: they're the only accurate translation between your body and their cut. Search for a "size guide" or "fit guide" link near the size selector, usually right below the dropdown menu where you'd normally just click a letter and move on.
Compare your number against the chest range listed for each size, not just the closest single figure. A well-built chart shows a range because bodies aren't perfectly uniform, and a couple inches of ease is normal and expected in a relaxed fit versus a regular fit like a tee meant for layering.
| Your chest measurement | Typical size |
|---|---|
| 34" to 36" | Small |
| 38" to 40" | Medium |
| 42" to 44" | Large |
| 46" to 48" | X-Large |
When your number sits between two sizes, size up for a relaxed drape and down for something closer to the body.
Landing between two sizes is common, and it's not a sign you measured wrong. If you prefer a shirt that skims the body without pulling, size down. If you want room to layer a jacket or hoodie over it, size up. Check our own size guide against your number before you buy, since our Supima cotton tee is cut with a deliberately relaxed shoulder and body that reads differently than a slim-fit brand's chart.
Finding your true fit
Two minutes with a tape measure beats guessing every time. You now know how to find the fullest part of your chest, keep the tape level, and read your number without holding your breath or puffing up. That single figure is more reliable than any dress size or old shirt pulled from your closet, and it works across every brand you shop from here on out.
Writing your measurement down somewhere you'll actually find it again saves you from repeating this whole process every time you shop. Consistent sizing starts with that one honest number, not with hoping a medium fits the way it did last time.
Ready to put it to use? Compare your chest measurement against our size guide and see the relaxed fit tees for men built to fit the body you actually have.